Mic test on PC before using Video Chat Softwares
October 30, 2013For this tutorial, I will teach you from a newly reformat pc using Windows XP. Once you follow the procedure, It will be easily for you to apply it in Windows 7 or latest versions.
Requirements; Sound Drivers, Headset already attached, Realtek Audio Drivers
Topic Level: Advance***
One day, I was browsing the net when one of my clients call me and as me for help. She is using Skype since the PC has been reformatted. Until one day, she woke up and notice that there is not sound that she hears when she began to speak in her camera. I began to pack-up my reformat tools and proceed to their home for a checkup.
At the first time I seated for just a second, I notice that the Sound icon at the taskbar have been lost, and there is no sound entering also in speakers even I play a music using a media player. I began to analyze the facts I have observed until I notice the following.
- THE SYSTEM HAS NO INSTALLED AUDIO DEVICE (E.G. SOUND DRIVERS) THAT MUST BE INSTALLED FIRST BEFORE YOU COMPLETELY USE THE PC. MAYBE IT ITS HAS BEEN CORRUPTED FROM UNKNOWN REASONS.
- HER CAMERA DOES SUPPORT THE VOICE RECOGNITION WITH THE INSTALLED MIC ATTACHED IN THE BODY OF THE CAMERA. BUT THE CAMERA CD OR DRIVERS ARE NOT YET INSTALLED.
Take note that your motherboard has all the capabilities in making the system works in a better performance If and only you installed its drivers. Without it, your MB is nothing.
So at first, I installed the Drivers and test the mic sounds.
1. Download and install all the audio drivers based in MB specs.
 Chipset Drivers is the set of drivers from Intel that includes the capabilities to function all expansion card inside the motherboards.
IDT is the Sound Driver of the PC and REALTEK WDM is an audio codec
For more information about codecs, please click here.
Most of the time, your motherboard includes a CD/DVD where it includes the set of drivers needed for your PC. Unless you lost or misplace it, it’s available for free in the Internet.
2. After installation, restart you system.
3. Once the audio drivers is installed, look at the taskbar if you notice sound icon. And then double click it and it will display the platform. Inside of it, you must notice a MIC option included in it.
3. Increase its volume slider to the highest.
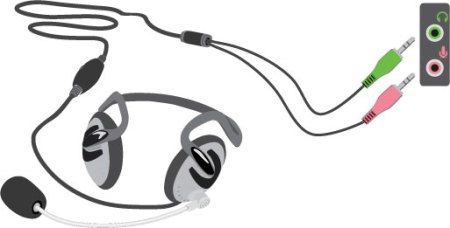
4. But wait, make sure before doing so after the you restart the system, your headset is already installed. Place the pink jack to the pick port and the green jack to the green port in either the front or at the back of the PC.
Now for the MIC Test Settings.
4. Look for Control Panel.
- Type Control panel at the address bar on the top of the My Computer Window,
- Expand Change Settings in System Task at the side of My Computer Window
- Expand Other Places and click Control Panel
- Type control panel in run command
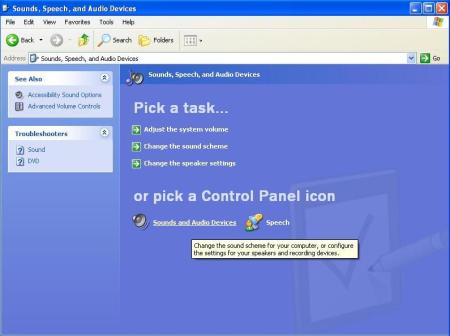
5. Now pick a category, choose Sounds
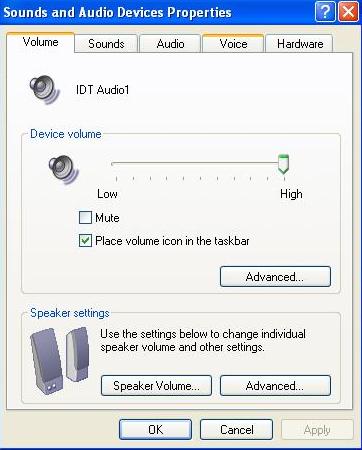
6. Click Sound and Audio Device.
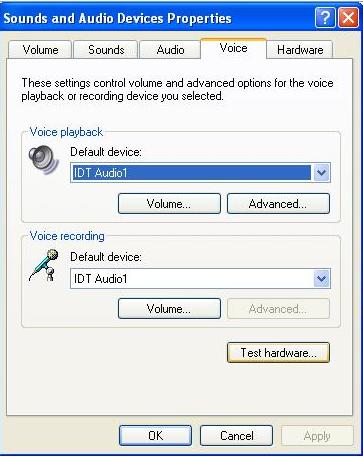
7. On the volume Tab switch to Voice.
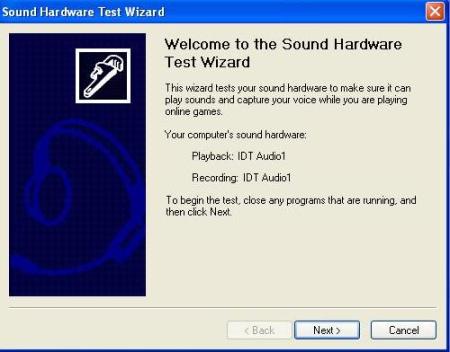
8. Click Test Hardware…
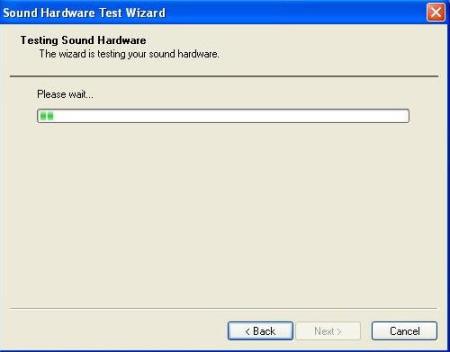
9. Wait till the test hardware loads…
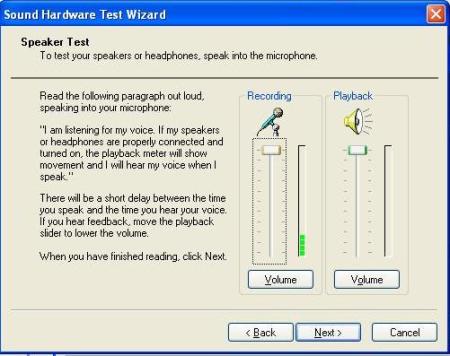
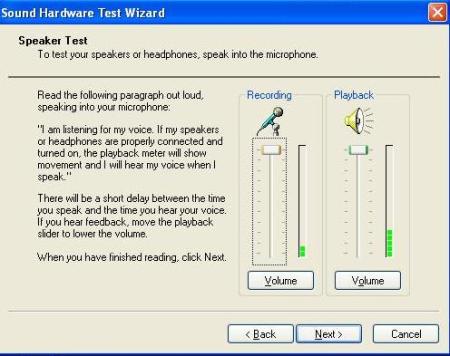
10. Now in the Speaker Test, you will notice that the Recording indicator will goes up as you speak. The next time you click next there must be no error. Because if it has, the cable attached begun to loose on its port. You need some adjustments.
it must look like this instead of error.
After the test, have it still open. Don’t click next yet and try your Skype Video Chat if its working properly.
For this tutorial, I have not include the installation of camera and audio drivers for the simplicity of the contents. But take note that all of them are preliminary before the following instructions must be followed. Thank you.
So long, net lovers!
![]()


